How to Install Google Analytics on your Website
John / Updated on 10 Nov 2023
After creating a new website and spending countless hours adding content to it, it's the dream of every website owner to see it receive as much traffic (visitors) as possible.
The more traffic, the higher the chances of conversion into sales, more customers, and brand awareness. As a blogger the more likely you are to get a higher earning through display ads and affiliate marketing.
To measure the growth of your website in terms of the traffic it receives then becomes quite crucial.
There are several website traffic analytics tools such as Google Analytics, AWStats, and Microsoft Clarity among others, that can help you track website traffic and user behavior on the site.
In this article, we will focus on Google Analytics, where you will learn what it is, what it does, and how to install it on your website.
What is Google Analytics?
Google Analytics is a free tracking software developed by Google that provides statistics on a website’s usage, including how much traffic it gets, where the traffic is coming from, how users behave within the website, how long they take on the website, and on each page, and much more.
What statistics does Google Analytics show?
Google Analytics is a very comprehensive tool with so much data about website traffic and user behavior. Below is just but a small list of metrics you can expect to find on Google Analytics about your website:
- Real-time traffic: The number of users currently on the website at the time of viewing. You can see details such as how many they are, from which countries they are viewing, which pages they are on, and the events they are triggering.
- Total traffic: The number of website visits and page views over a given period.
- Traffic sources: The channels and mediums from which users are finding and getting into your website e.g. from Google search, Bing, Social media, direct traffic, etc.
- Demographic details: The top countries and cities that your web visitors are coming from.
- Popular pages: The pages on your website that are getting the most visits.
- Tech details: The details such as the devices, operating systems, and browsers that your website visitors are using.
- User engagement: Details on how long the visitors stay on your website and how they interact with your pages and content.
The above are just a few examples but there is much more data that can provide you with important insights to help optimize the site and content for a better user experience, performance, and more conversions.
Installing Google Analytics on your website
Follow the step-by-step process below to install and set up Google Analytics on your website:
Step 1: Access Google Analytics via https://analytics.google.com/ to get started. You will be required to have a Google account to do this. If you have a Gmail address, then you already have a Google account. Else, you will have to create one.
If you are not logged in to a Google account, you will be redirected to the login page below:
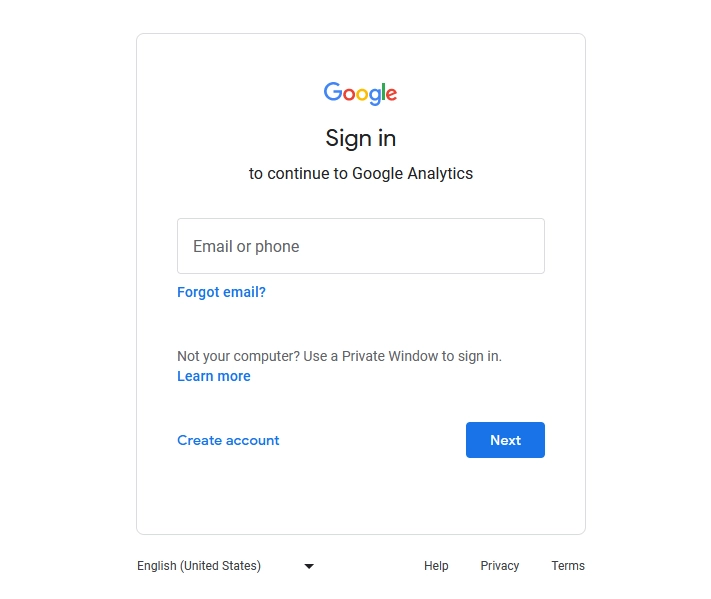
Log in using the Google account that you want to associate with Google Analytics.
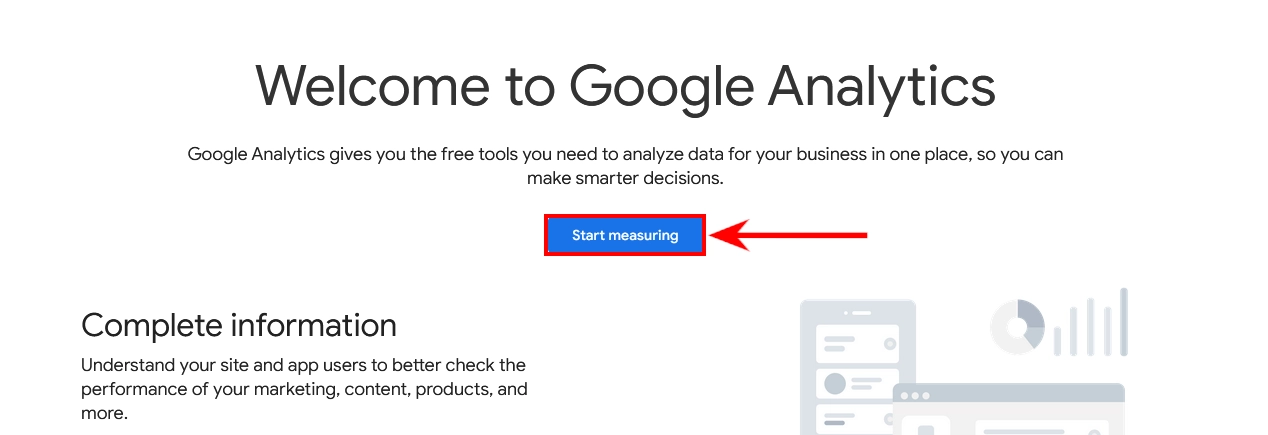
Step 2: Upon logging in, you will be taken to the Google Analytics welcome page. Click on the "Start Measuring" button to start the account setup process.
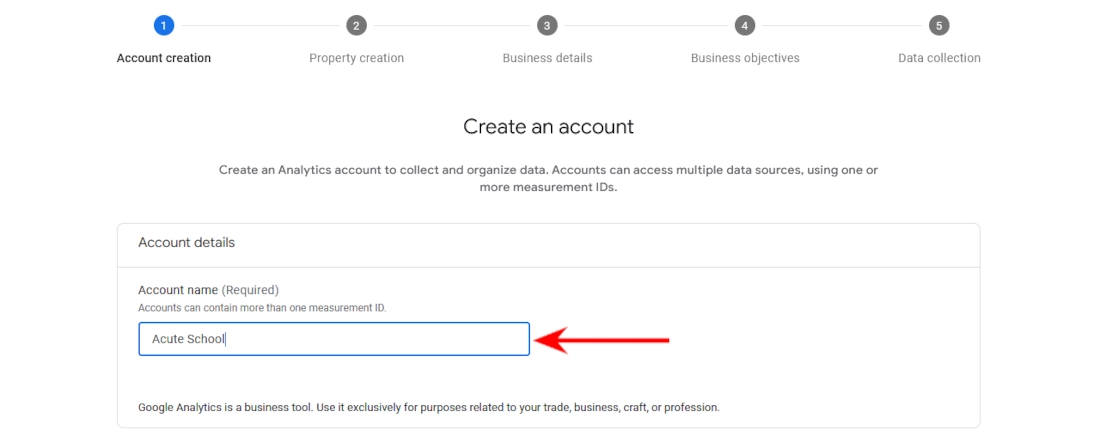
Step 3: In the next step you will be required to create a Google Analytics account. The account can have a single or multiple properties (websites or apps) associated with it. You can enter the business/organization name as the account name if you will only have one website in it, or a more general (e.g. parent organization) name if it will comprise multiple websites.
Enter your preferred name in the "Account name" input field and then click on the "Next" button at the bottom.
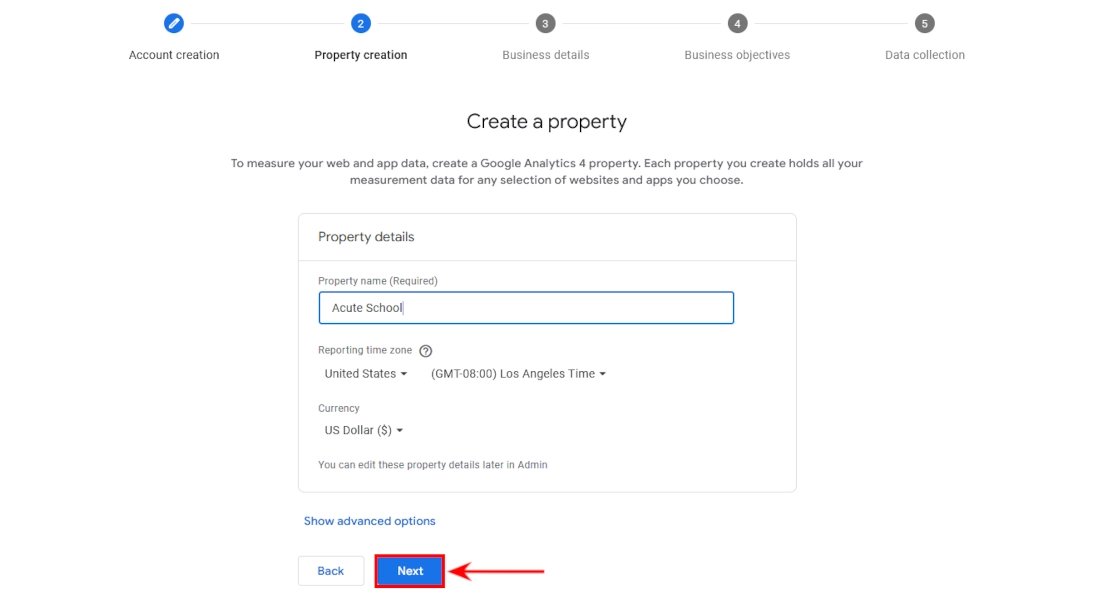
Step 4: Add a property to your account. It can be a website or an app. Enter your preferred property name and select a reporting timezone (select your country). Click the "Next" button.
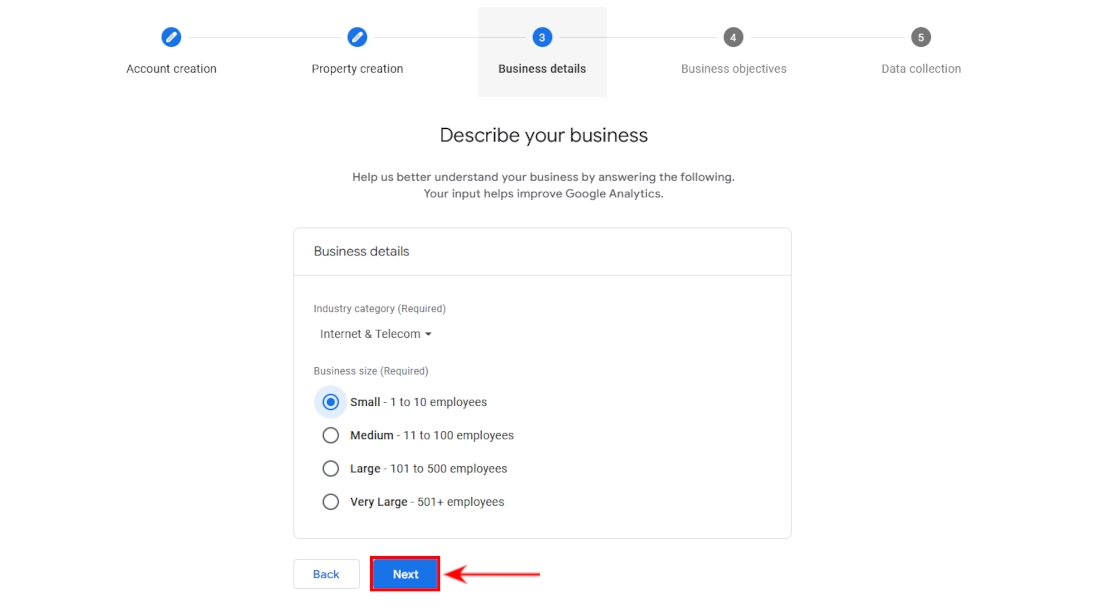
Step 5: Add the business information. Select the category that your business best fits in, choose your business size in terms of the number of employees, and then click on the "Next" button.
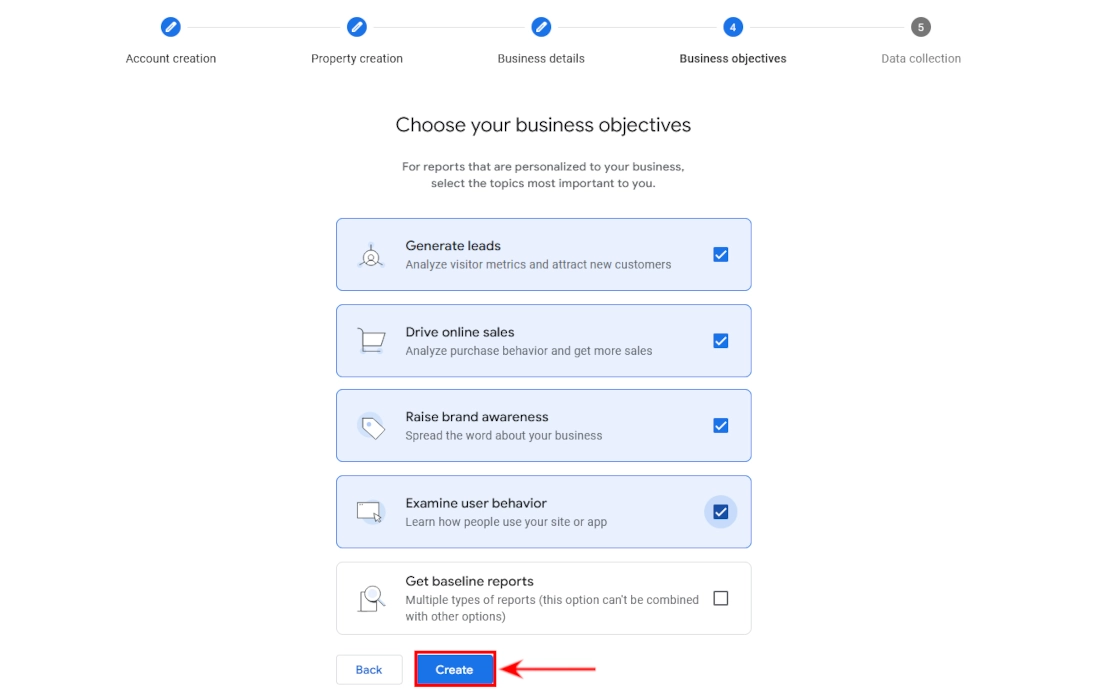
Step 5: Choose your business objectives. Select the topics that are most important to your business in regard to the use of Google Analytics. Then click on the "Create" button.
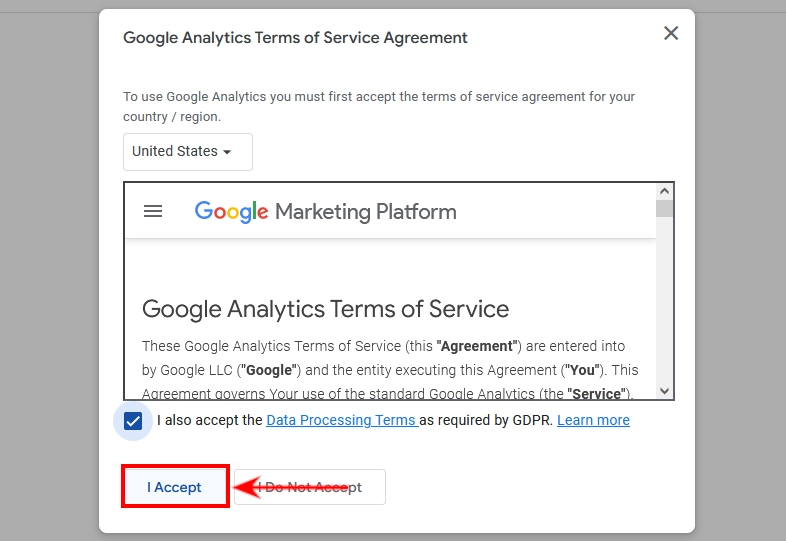
Step 5: Agree to the terms of service. A popup modal with Google Analytics terms of service will open. Mark the checkbox and then click on the "I Accept" button.
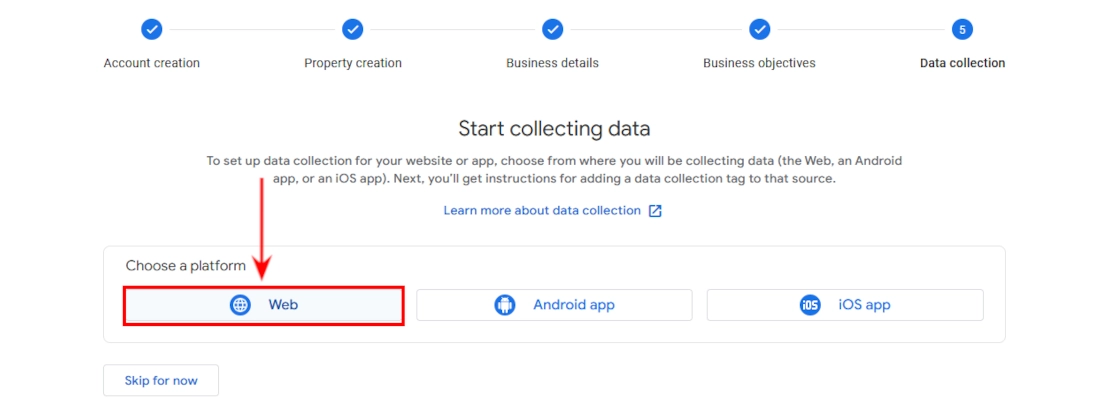
Step 6: Create a Data Stream for your property. A data stream is a flow of data from a customer touchpoint (e.g., a website or an app) to Google Analytics. There are 3 platforms supported for the data streams which include the Web, Android app, and iOS app.
In our case, since we are adding Analytics to a website, we will choose the Web platform by clicking on the Web option.
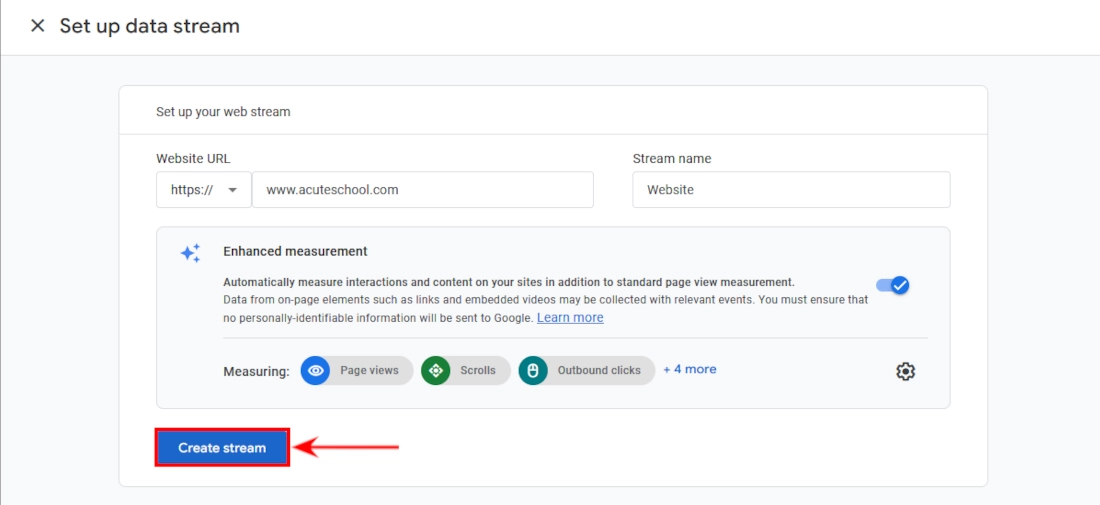
Step 7: Set up the data stream. Enter the website address and create a stream name. You can give the stream any relevant name you want (e.g. Website). Click on the "Create Stream" button.
Step 8: There are two methods of installation:
- Installation with a website builder or CMS
- Manual Installation
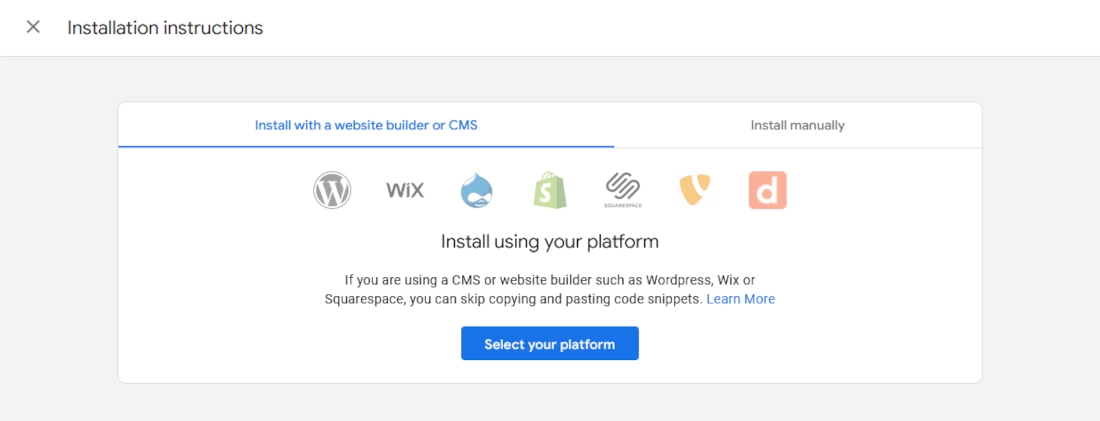
Installation with a website builder or CMS
This is the selected method by default. If your website is built with a website builder or CMS such as WordPress, this is the option to go by. Click on the "Select your platform" button, choose the relevant option from the rest, and follow the easy step-by-step process given under it to install the Google Analytics tracking code on your website.
Manual Installation
Alternatively, you can add the tracking code manually to your website, if it's not built using a CMS or website builder. To do so, switch to the "Install manually" tab.
You will see JavaScript tracking code that is unique to your website as shown below.
Just copy the above tracking code and paste it inside the head section (<head>) of your website pages HTML code that you wish to track.
If you use PHP, simply create a file and name it something like "google-analytics.php", paste the tracking code in it, and then include it inside your pages <head> section using include() or include_once() PHP functions.
That's all. You can now start seeing your website visits statistics in Google Analytics.
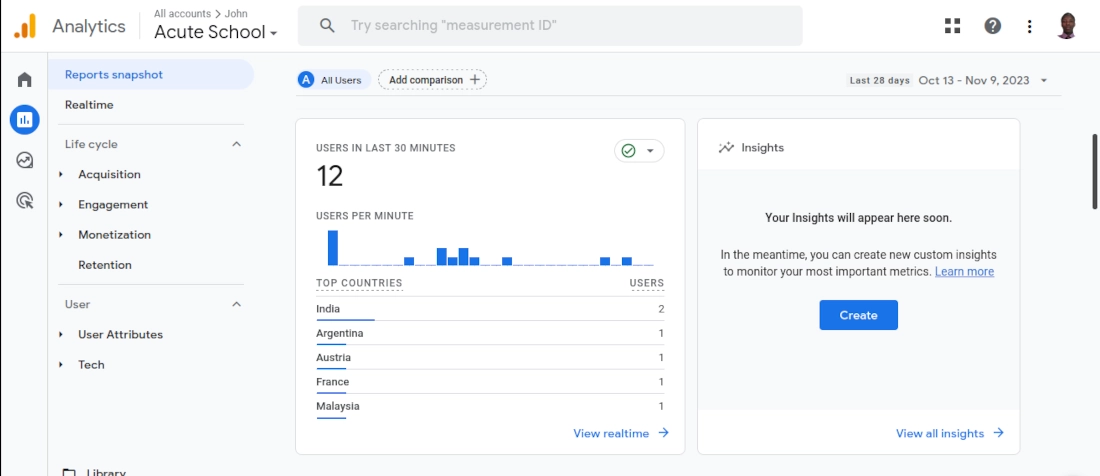
To test whether the tracking code is working properly, open the Analytics home page or the Report Snapshots page and then open the website on another tab or browser.
You should be able to see the active user(s) on the website in real-time in Google Analytics.
Adding a new property to an existing Google Analytics account
If you already have a Google Analytics account and you want to add a different website for Analytics tracking, you can simply do it through a simple process.
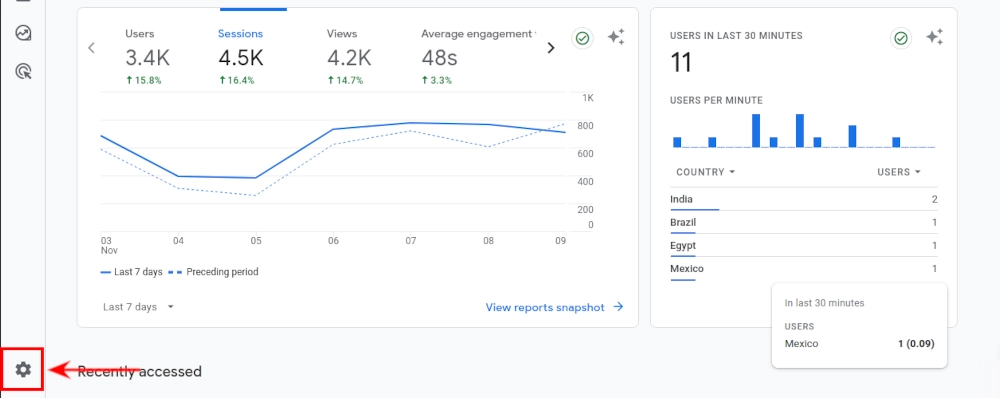
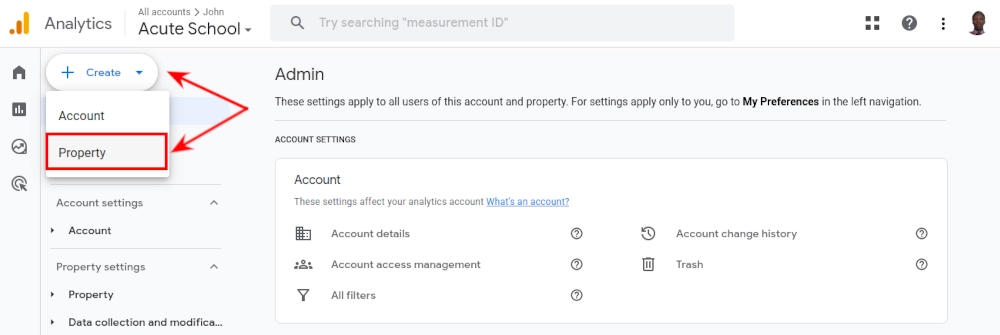
Just click on the "Admin" (gear icon) link at the bottom left.
Click on the "+ Create" button and then select the "Property" option. You will be taken through the same process as explained above.
Google Analytics is intuitive and you can easily understand how to use it without so many hassles.
It is my hope you found this article helpful, and that it helps you set up Google Analytics on your website.