How to Add a User in Bing Webmaster Tools
John / 22 Sep 2023
Bing Webmaster Tools is a valuable platform that can provide you with important insights into how your website performs on Bing search.
It provides a variety of tools and reports that can help you manage your website's presence and improve its visibility on Bing.
For some reason, you may want to add a user to view the reports and/or manage your website in Bing Webmaster Tools.
In this guide, I will walk you through the step-by-step process of adding users to your website in your Bing Webmaster Tools account.
Before getting to the process, let's first understand who a user is, and the various user roles.
Understanding User Roles in Bing Webmaster Tools
A user can be defined as an individual or entity that is given access to a specific website within Bing Webmaster Tools.
There are 3 different roles for users in Bing Webmaster Tools, each with varying levels of access:
- Administrator: This role allows a user to control all features and functions, including adding and delegating control to new users. Be careful when assigning this role as the user will be equal to you in roles and permissions.
- Read-Write: This role allows a user to access and control almost all features within the Webmaster account, but they cannot add other users.
- Read-only: This role allows a user to view all features and reports within an account, but they cannot change settings or add other users.
Adding a User in Bing Webmaster Tools
Below is the step-by-step process for adding a user:
Step 1: Log in to Your Bing Webmaster Tools Account
Visit https://www.bing.com/webmasters in your web browser and sign in using your credentials.
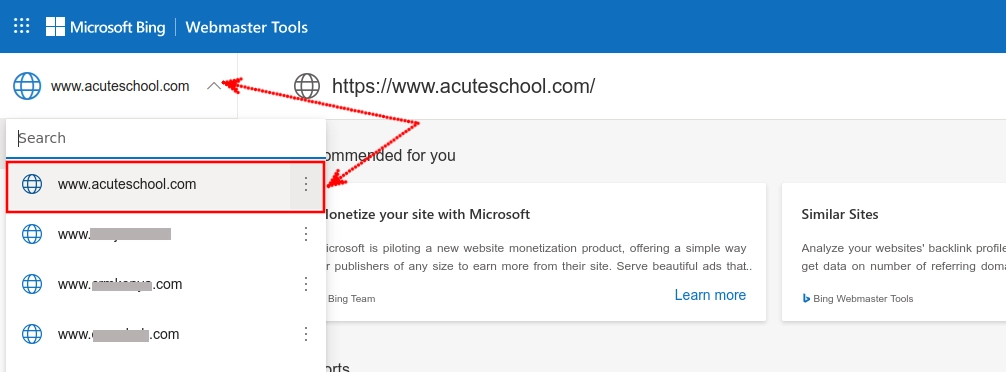
Step 2: Access Your Website
Once you're logged in to your Bing Webmaster Tools account, you'll need to access the website you want to add user(s) to. If you have just one website under your account, it will be selected for you by default so no action will be required of you in this step.
However, if you have more than one website in your account, you will need to select it from the dropdown options at the top-left corner of the page.
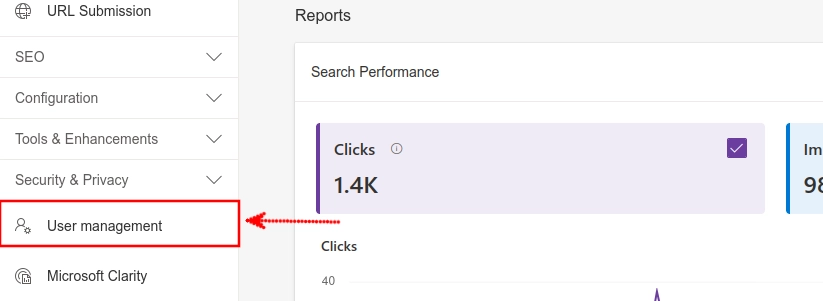
Step 3: Navigate to User Management
In the left sidebar menu, scroll down to the bottom and click on the "User Management" option.
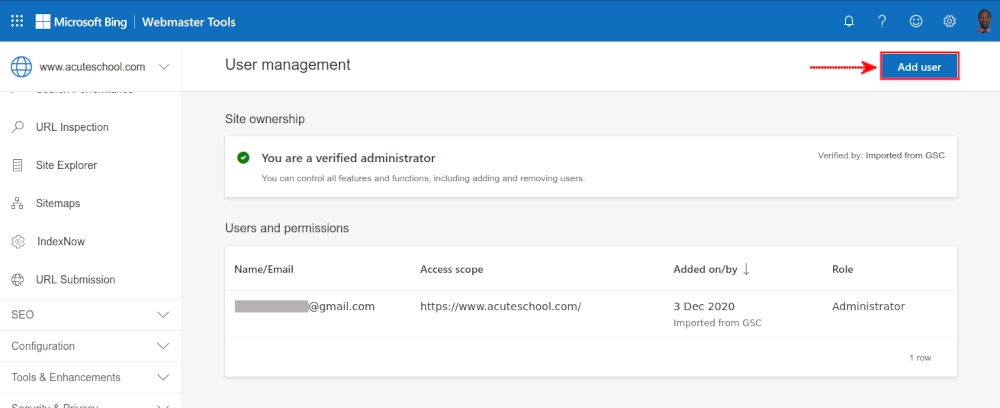
Step 4: Add a User
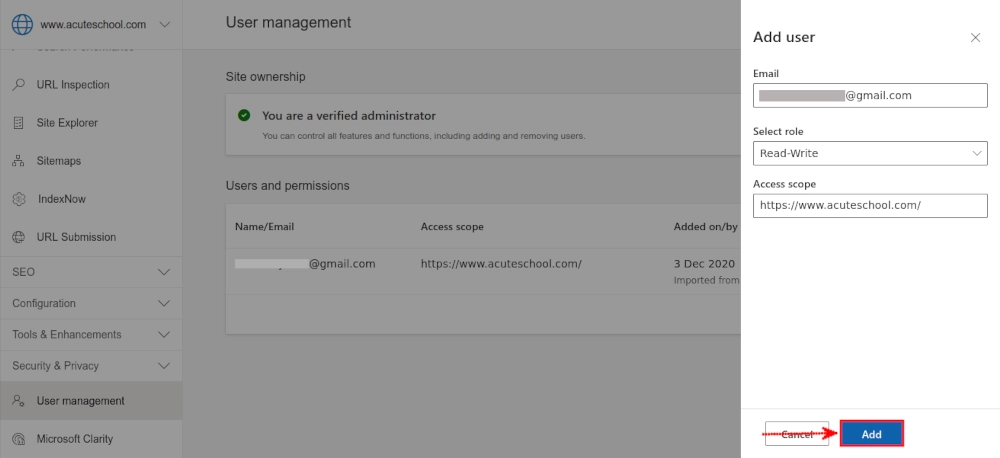
Click on the "Add User" button at the top-right corner of the "User Management" page.
In the form that opens up, enter the email address of the person you want to invite to access your website's data in Bing Webmaster Tools. That person needs to already have an account with this email address. If not registered yet, ask them to sign up in Bing Webmaster Tools before adding them.
Choose the most appropriate role depending on the access level you want to give the user, as discussed in the "User Roles" section.
The website URL of the currently selected website will be auto-filled for you in the "Access Scope" field. Click on the "Add" button to proceed.
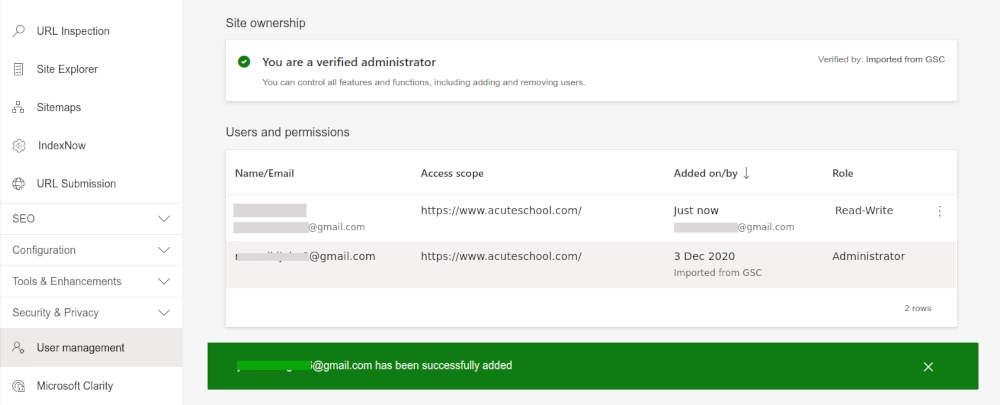
You will see a success message that the user has been successfully added. You will also be able to view that user's details under the "Users and permissions" section of the "User management" page.
Step 5: User Access to Website Data
When the added user logs into their Bing Webmasters Tools account, they will have access to your website data and will be able to interact with it in the same way as you but according to the role assigned.
Managing Users in Bing Webmaster Tools
As the administrator, once you have added users, you can manage their access and permissions at any time. Here's how to do it:
Once logged in to your account, select the respective website, and navigate to the User Management page. Under the "Users and permissions" section, click on the three dots icon at the right side of the user record that you want to make changes to.
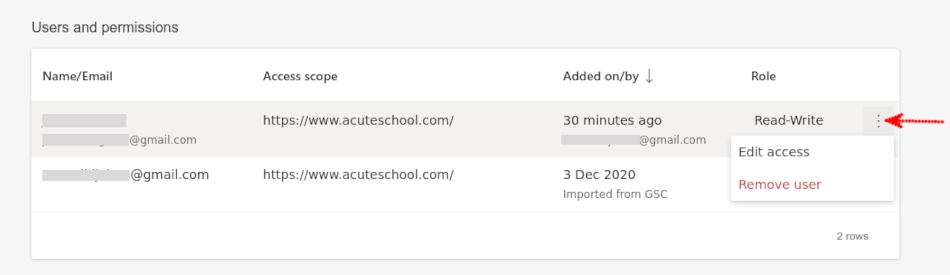
You will be provided with two options:
- Edit Access: This allows you to select and change the permission level you want to grant to this user. Click on the "Save" button after changing a user's role.
- Remove Access: This allows you to remove the user's ability to access the website data in their account. You will be prompted through a pop-up modal to confirm the access removal, where you will be required to type a part of their email address and then click on the "Remove" button.
Conclusion
Adding users to a website in your Bing Webmaster Tools account is a necessary step when collaborating with others to improve your website's performance on Bing search.
By following the step-by-step guide outlined above, you can easily grant access to team members, partners, or clients and ensure that they have the appropriate level of access to your website's data.
Be sure to manage user access carefully to maintain a secure and productive environment within Bing Webmaster Tools.